The Ultimate Guide to Buy Epoxy Resin Art Supplies Online

Buy Epoxy Resin Art

Epoxy resin art has gained immense popularity among artists and hobbyists for its versatility and stunning results. Whether you’re a beginner or a seasoned artist, having the right supplies is crucial for creating beautiful resin art pieces. In this ultimate guide, we’ll walk you through everything you need to know to buy epoxy resin art supplies online, ensuring you get the best products for your creative projects.

Why Choose Epoxy Resin Art?

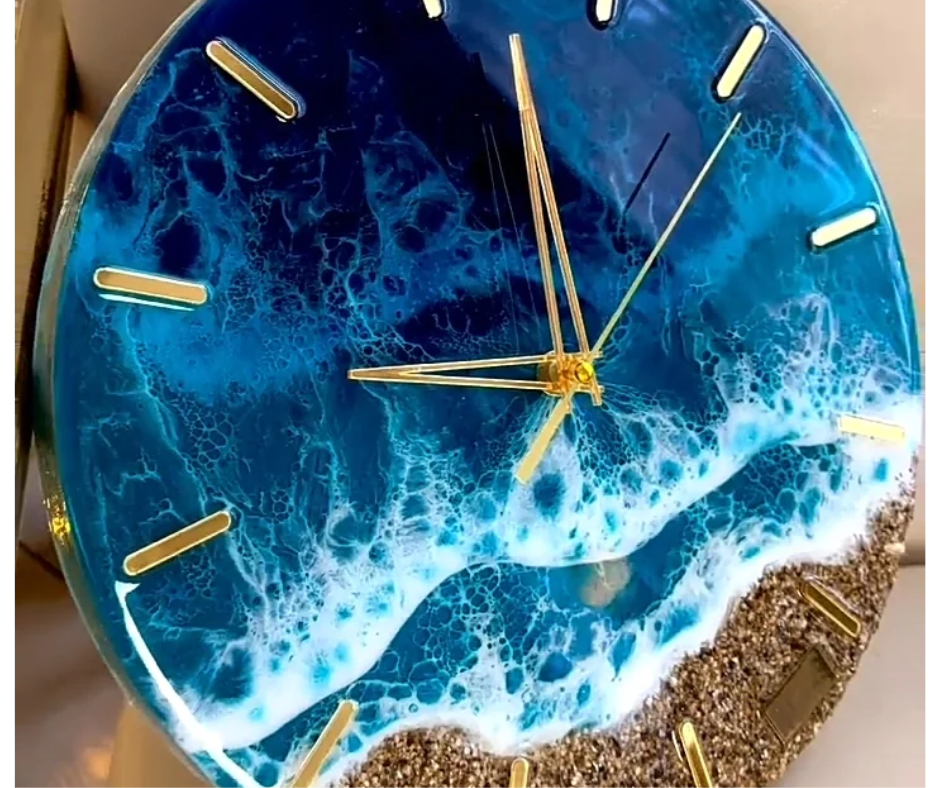
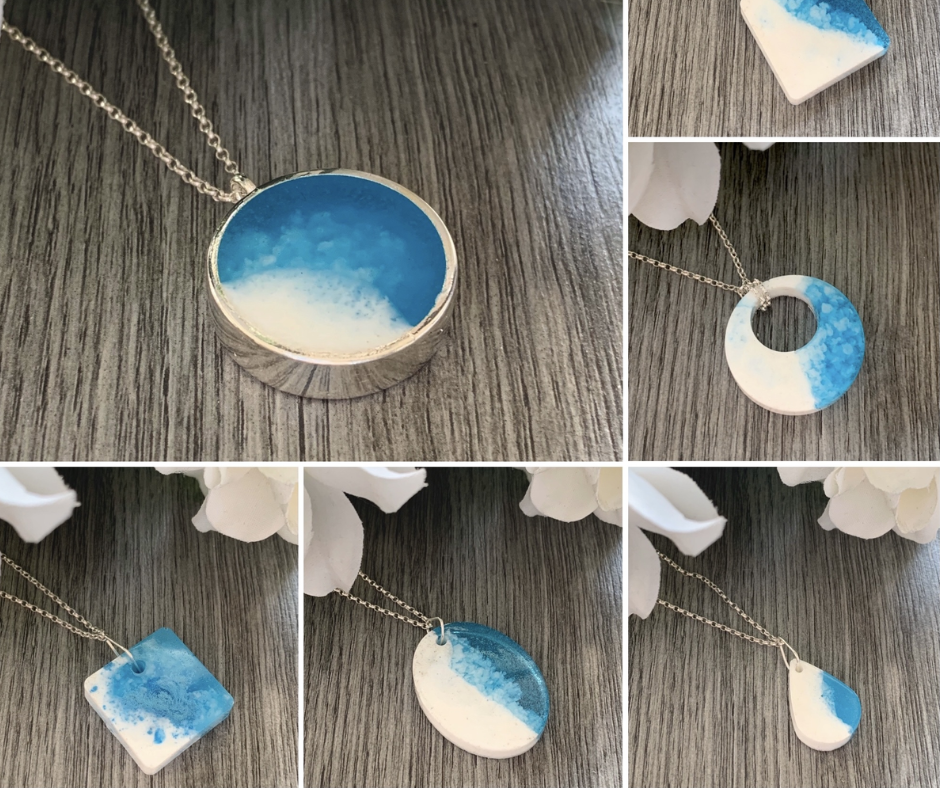
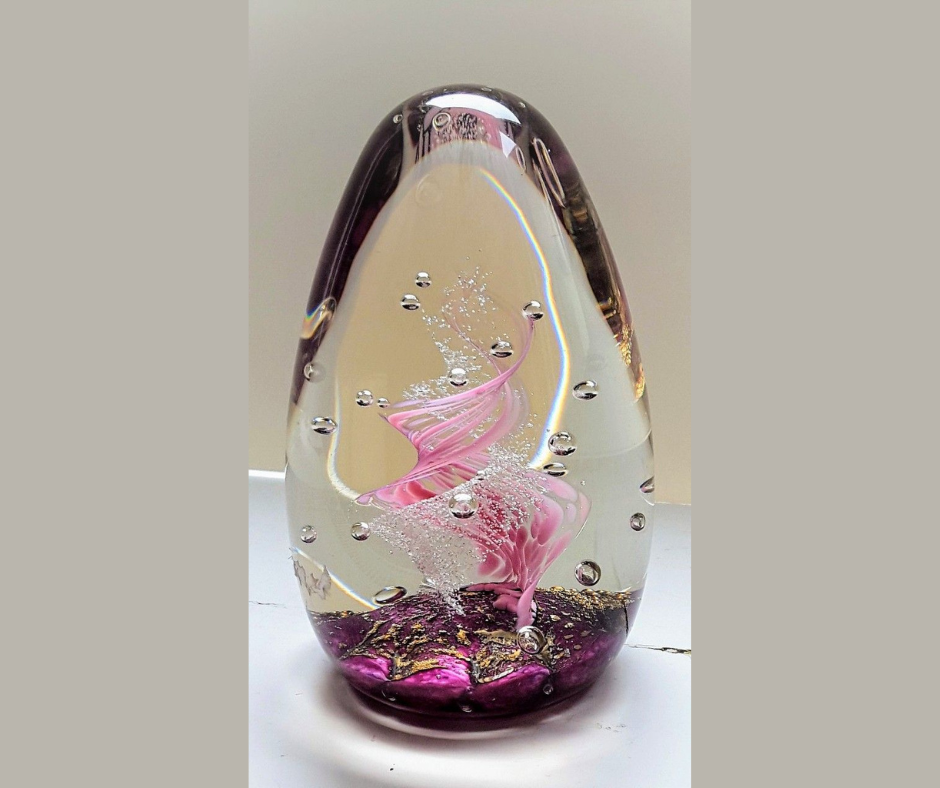
Epoxy resin art is a gateway to creating glossy, durable, and mesmerizing artworks. Its versatility is unmatched, making it perfect for crafting custom jewelry, coasters, wall art, and more. The high-gloss finish and the ability to embed various materials make it a favorite medium for many artists, offering endless possibilities for unique creations. To embark on this artistic journey, you’ll need a few essential supplies that you can conveniently purchase online.

Essential Supplies to Buy for Epoxy Resin Art

Epoxy Resin

When you buy epoxy resin art supplies, the quality of the resin is paramount. Look for a clear, non-toxic, and UV-resistant resin to ensure your artwork remains vibrant and durable over time. Online stores often offer detailed descriptions and customer reviews to help you make an informed decision.

Resin Art Kit

A resin art kit is an excellent choice for beginners. These kits typically include resin, hardener, mixing cups, stir sticks, and sometimes additional accessories like gloves and droppers. When you buy a resin art kit, you get all the essential tools you need to start your creative journey.

Resin Art Molds

To create specific shapes and designs, you’ll need resin art molds. Whether you want to make coasters, jewelry, or decorative items, there are molds available for every project. When you buy resin art molds online, check for high-quality silicone molds that are flexible and easy to demold.

Fluid Acrylic Paint

Adding color to your resin art is where the magic happens. Fluid acrylic paint is ideal for this purpose. It blends well with resin and offers a wide range of vibrant colors. When you buy fluid acrylic paint, look for high-pigment, water-based options for the best results.

Tools for Fluid Paint Pouring

Fluid paint pouring is a widespread technique in resin art. To achieve beautiful patterns and effects, you’ll need tools like pouring cups, spatulas, and heat guns. These tools help you manipulate the paint and resin mixture to create stunning designs.

Tips for Buying Epoxy Resin Art Supplies Online at Pigmo Shop

buy epoxy resin art
buy epoxy resin art

Shopping for epoxy resin art supplies online can be overwhelming, with so many options available. At Pigmo Shop, we want to make sure you have the best experience and get the highest quality products. Here are some essential tips to keep in mind when purchasing epoxy resin art supplies online:

Read Reviews and Ratings

Customer reviews and ratings provide valuable insights into the quality and performance of the products. Always check these before purchasing to ensure you’re buying from a reputable seller. At Pigmo Shop, we pride ourselves on our excellent customer feedback and high ratings.

Compare Prices

Prices can vary significantly between different online stores. Take the time to compare prices and check for any ongoing discounts or offers. However, don’t compromise on quality for the sake of a lower price. Pigmo Shop offers competitive pricing without sacrificing quality.

Check Shipping and Return Policies

Make sure to review the shipping and return policies of the online store. Ensure they offer reliable shipping services and a hassle-free return policy in case the products don’t meet your expectations. Pigmo Shop provides fast shipping and a straightforward return process to ensure your satisfaction.

Look for Bundles and Kits

Buying supplies in bundles or kits can be cost-effective and convenient. Many online stores offer bundled deals that include resin, molds, paints, and tools, saving you both time and money. Pigmo Shop frequently offers special bundles that are perfect for both beginners and experienced artists.

Join Online Communities

Join resin art communities on social media platforms and forums. These communities often share recommendations and reviews of the best places to buy epoxy resin art supplies online. Connecting with other artists can provide valuable insights and inspiration. Pigmo Shop is also active in various resin art communities and values customer feedback and engagement.
By following these tips, you can ensure a smooth and satisfying shopping experience when buying epoxy resin art supplies online. Visit Pigmo Shop today for all your resin art needs!

Creating stunning epoxy resin art requires high-quality supplies and tools. By knowing what to look for and where to buy, you can ensure that your creative projects turn out beautifully. Whether you’re looking to buy epoxy resin art materials, a resin art kit, resin art molds, fluid acrylic paint, or tools for fluid paint pouring, shopping online offers a convenient and comprehensive selection. Start your resin art journey today and unleash your creativity with the best supplies at your fingertips!

Tips and Techniques for Achieving a Glossy Finish with Crystal Clear Resin

Crystal clear resin has become a popular choice for artists and DIY enthusiasts looking to create stunning, glossy finishes on their projects. Whether you’re working on a piece of jewelry, a tabletop, or a piece of art, achieving a glossy finish with crystal-clear resin requires the proper techniques and attention to detail. In this blog, we’ll explore some tips and techniques to help you achieve that perfect glossy finish every time.

Understanding Crystal Clear Resin

Crystal clear resin is a type of epoxy resin that, when mixed and cured correctly, dries to a clear, glass-like finish. Unlike other types of resin, crystal clear resin is designed to minimize yellowing and provide exceptional clarity, making it ideal for projects where a glossy finish is desired.

Preparing Your Workspace

Before you start working with crystal clear resin, it’s essential to prepare your workspace correctly. It includes setting up a clean and well-ventilated area, as well as gathering all the necessary materials and tools you’ll need for your project.

Preparing the Resin

To achieve a glossy finish with crystal clear resin, it’s crucial to mix the resin and hardener in the correct ratio. It will ensure that the resin cures properly and maintains its clarity. Additionally, it’s essential to avoid introducing air bubbles into the mixture, as these can mar the final finish.

Adding Pigments and Inclusions

Adding pigments to your resin can enhance the color and depth of your finished piece. When choosing pigments for a glossy finish, opt for transparent or translucent colors that won’t cloud the resin. Additionally, incorporating inclusions such as glitter or metallic flakes can add sparkle and interest to your project.

Pouring and Spreading the Resin

When pouring your resin, it’s essential to do so in a slow, controlled manner to avoid creating air bubbles. Once poured, use a spreader or brush to evenly distribute the resin over your surface, ensuring a smooth and consistent coat.

Removing Bubbles

Despite your best efforts, air bubbles may still form in your resin. To remove these bubbles, gently pass a heat source, such as a torch or heat gun, over the surface of the resin. It will cause the bubbles to rise to the surface and pop, leaving behind a smooth finish.

Curing the Resin

The curing process is crucial for achieving a glossy finish with crystal-clear resin. Ensure that your project is kept in a dust-free environment during curing to prevent any imperfections from marring the surface of your resin.

Sanding and Polishing

To get rid of any flaws or rough patches, you might need to sand your resin once it has dried. To get a smooth surface, begin with coarse sandpaper and progressively move up to finer grit. To bring out the glossy surface, polish the resin with a polishing agent near the end.

Troubleshooting

If you encounter any issues during the resin pouring or curing process, don’t panic. Many common issues, such as bubbles or uneven curing, can be easily fixed with the proper techniques. Refer to the manufacturer’s instructions or seek advice from other resin artists to troubleshoot any problems you encounter.

Safety Precautions

Working with resin can be hazardous if proper safety precautions are not taken. Always wear gloves, goggles, and a mask when working with resin to protect yourself from fumes and skin irritation. Additionally, ensure that you dispose of resin and waste materials properly to minimize environmental impact.

Achieving a glossy finish with crystal clear resin is a rewarding process that requires patience and attention to detail. By following the tips and techniques outlined in this blog, you can create stunning, glossy finishes on your projects that are sure to impress.

Discover a World of Creativity at Pigmo Shop: Your Go-To for Resin Art, Acrylic Painting, Candle Making, and More

At Pigmo Shop, we are dedicated to being your one-stop destination for all your creative needs. Whether you’re into resin art, acrylic painting, candle making, or crafting with silicone molds, we’ve got you covered. Our extensive selection of high-quality materials and supplies ensures that you can find everything you need to bring your artistic visions to life. Please explore our website today to discover a wide range of products and unleash your creativity with Pigmo Shop!

Unleash Your Inner Artist: 3 Inspiring Resin Art Ideas

3 Inspiring Resin Art Ideas

Creativity knows no bounds and resin art offers a captivating canvas for expressing your imagination. Resin provides endless possibilities whether you’re a seasoned artist or just dipping your toes into the art world. From mesmerizing abstract designs to intricate landscapes, the only limit is your creativity. This blog will explore ten inspiring resin art ideas to ignite your imagination and elevate your artistic journey.

Ocean-Inspired Resin Waves:

Ocean-Inspired Resin Waves

Ocean-Inspired Resin Waves

The ocean has long been a source of inspiration for artists worldwide. Its vastness, beauty, and ever-changing nature evoke a sense of wonder and tranquility. Ocean-inspired resin waves offer a unique way to bring the mesmerizing essence of the sea into your artwork. In this article, we’ll explore the techniques and steps to create stunning resin waves that capture the beauty and movement of the ocean.

Understanding Resin Art:

Resin art involves using a two-part epoxy resin mixture that, when combined, creates a durable and glossy finish. It’s a versatile medium that allows artists to experiment with colors, textures, and effects to create captivating artwork. Creating ocean-inspired resin waves aims to mimic the fluidity and depth of natural waves crashing against the shore.

Materials Needed:

  • Epoxy resin and hardener
  • Resin pigments in various shades of blue, white, and turquoise
  • Mixing cups and stirring sticks
  • Disposable gloves and protective gear
  • Resin mold or canvas
  • Heat gun or torch for removing air bubbles
  • Optional: glitter or mica powder for added shimmer

Step-by-Step Guide:

  1. Prepare your workspace: Ensure your workspace is clean, well-ventilated, and free from dust or debris that could contaminate your resin artwork.
  2. Mix the resin: Follow the manufacturer’s instructions to mix the epoxy resin and hardener in the correct ratio. Stir the mixture thoroughly until it is clear and accessible from streaks.
  3. Add pigments: Divide the mixed resin into separate cups and add resin pigments to create shades of blue, white, and turquoise. Experiment with blending the colors to achieve the desired gradient effect.
  4. Pour the resin: Pour a layer of clear resin onto your chosen surface, whether it’s a resin mold or canvas. It will serve as the base layer for your ocean waves.
  5. Make the waves happen: Pour thin streams of each hue onto the foundation layer of resin using a mixture of turquoise, white, and blue resin. To create patterns and swirls resembling ocean waves, combine the colors using a palette knife or stirring stick. 
  6. Add depth and texture: To enhance the depth and texture of your resin waves, use a heat gun or torch to heat the surface of the resin gently. It will help remove air bubbles and create natural-looking ripples and waves.
  7. Optional embellishments: For added visual interest, consider sprinkling glitter or mica powder onto the wet resin to mimic the sparkle of sunlight dancing on the water’s surface.
  8. Allow to cure: Once you’re satisfied with the appearance of your resin waves, allow the artwork to cure according to the manufacturer’s instructions. It typically involves letting the resin dry and harden for 24-48 hours.
  9. Finishing touches: Once the resin has fully cured, remove it from the mold or prepare it for display on canvas. You can further enhance your ocean-inspired resin waves by adding additional layers of resin for depth or framing the artwork for a polished finish.

Conclusion:

Ocean-inspired resin waves offer a captivating way to bring the beauty and tranquility of the sea into your home or studio. You can create stunning artwork capturing the ocean’s movement and depth with suitable materials and techniques. So, gather your supplies, unleash your creativity, and embark on a journey of artistic exploration with ocean-inspired resin waves.

II. Resin Jewelry Making:

Resin art Jewelry

Resin Jewelry

A Guide to Resin Jewelry Making

Resin jewelry making has surged in popularity recently, offering artists and crafters a versatile medium to create unique and personalized accessories. Resin jewelry allows for endless creativity & customization, from vibrant pendants to intricate earrings. This article delves into resin jewelry making, exploring the materials, techniques, and steps of crafting stunning wearable art pieces.

Materials Needed:

  • Epoxy resin and hardener
  • Silicone molds in various shapes and sizes
  • Resin pigments, dyes, or alcohol inks for coloring
  • Glitter, mica powder, or other embellishments
  • Jewelry findings (e.g., earring hooks, necklace chains, jump rings)
  • Disposable gloves and protective gear
  • Stirring sticks and mixing cups
  • Heat gun or torch for removing air bubbles
  • Optional: Resin doming kit for creating a glossy finish

Step-by-Step Guide:

  1. Prepare your workspace: Set up a clean, well-ventilated workspace with all necessary materials within reach. Lay down a protective covering to prevent spills & stains.
  2. Mix the resin: Follow the manufacturer’s instructions to mix the epoxy resin and hardener in the correct ratio. Stir the mixture thoroughly until it is clear and accessible from streaks.
  3. Add color and embellishments: Divide the mixed resin into separate cups and add resin pigments, dyes, or alcohol inks to create the desired colors for your jewelry pieces. You can also incorporate glitter, mica powder, or other embellishments to & sparkle and texture.
  4. Pour the resin into the molds: Gently fill the silicone molds with colored resin until the required level is reached. To make swirls and patterns in the resin or to reposition any implanted ornaments, use a stirring stick or toothpick. 
  5. Remove air bubbles: To ensure a smooth and bubble-free finish, use a heat gun or torch to heat the resin’s surface gently. It will help to release any trapped air bubbles and create a flawless finish.
  6. Allow to cure: Once you’re satisfied with the appearance of your resin jewelry pieces, allow them to cure according to the manufacturer’s instructions. It typically involves letting the resin dry and harden for 24-48 hours.
  7. Demold and finish: Carefully remove the cured resin pieces from the molds. If desired, sand any rough edges or imperfections using fine-grit sandpaper. You can also use a resin doming kit to create a glossy, polished finish on the surface of your jewelry pieces.
  8. Attach jewelry findings: Once your resin pieces are fully cured & finished, attach jewelry findings such as earring hooks, necklace chains, or jump rings using strong adhesive or embedding them directly into the resin during the casting process.
  9. Wear and enjoy: It’s time to wear and admire your gorgeous resin jewelry pieces! These unique items will turn heads wherever you go, whether keeping them for yourself or giving them as gifts. 

Conclusion:

Resin jewelry making offers a fun and rewarding way to express creativity and style. With a few basic materials & techniques, you can create beautiful and personalized accessories that are as unique as you are. So, gather your supplies, unleash your imagination, and start crafting your wearable works of art with resin jewelry making!

III. Crystal Clear Resin Sculptures:

Crystal Clear Resin Sculptures

Crystal Clear Resin Sculptures

The Art of Crystal Clear Resin Sculptures

In art, transparency can be just as captivating as color. Crystal transparent resin sculptures offer artists a unique medium to explore the beauty of transparency and light. From delicate figurines to intricate abstract forms, these sculptures invite viewers to marvel at the play of light and shadow within their transparent depths. In this article, we’ll delve into the fascinating world of crystal transparent resin sculptures, exploring the materials, techniques, & creative possibilities they offer.

Materials Needed:

  • Epoxy resin and hardener
  • Silicone molds or casting forms
  • Disposable gloves & protective gear
  • Stirring sticks and mixing cups
  • Optional: Resin-compatible pigments or dyes for tinting
  • Optional: Embedded objects or inclusions for added interest
  • Heat gun or torch for removing air bubbles
  • Sandpaper or polishing compound for finishing touches

Step-by-Step Guide:

  1. Prepare your workspace: Set up a clean, well-ventilated workspace with all necessary materials within reach. Lay down a protective covering to prevent spills and stains.
  2. Mix the resin: Follow the manufacturer’s instructions to mix the epoxy resin and hardener in the correct ratio. Stir the mixture thoroughly until it is clear and accessible from streaks.
  3. Optional: Add color or inclusions: Add resin-compatible pigments or dyes to tint the resin to your desired hue. For added visual interest, you can also incorporate embedded objects or inclusions such as flowers, shells, or metallic flakes.
  4. Pour the resin: Fill silicone molds or casting forms to the correct level by carefully pouring the blended resin into them. Use a stirring stick or toothpick to make swirls and patterns in the resin or reposition any implanted objects.
  5. Remove air bubbles: To ensure a smooth and bubble-free finish, use a heat gun or torch to heat the resin’s surface gently. It will help to release any trapped air bubbles and create a flawless finish.
  6. Allow to cure: Once you’re satisfied with the appearance of your resin sculpture, allow it to cure according to the manufacturer’s instructions. It typically involves letting the resin dry and harden for 24-48 hours.
  7. Demold and finish: Carefully remove the cured resin sculpture from the mold or casting form. If desired, sand any rough edges or imperfections using fine-grit sandpaper. You can also use a polishing compound to buff the sculpture’s surface to a glossy finish.
  8. Display and admire: Your stunning crystal clear resin sculpture is ready to be displayed and admired! Whether a standalone piece or part of a larger installation, its transparent beauty will captivate viewers and spark conversation.

Creative Possibilities:

Crystal clear resin sculptures offer endless creative possibilities for artists and makers. Experiment with different molds, shapes, & sizes to create sculptures that range from small and delicate to large and imposing. Explore the interplay of light and shadow within the transparent resin to create captivating visual effects. Incorporate embedded objects, inclusions, or even LED lights to add layers of complexity and intrigue to your sculptures.

Crystal clear resin sculptures are a testament to the beauty and versatility of transparent materials in art. With a few basic materials and techniques, artists can create stunning sculptures that capture the imagination & inspire wonder. So, gather your supplies, unleash your creativity, and start crafting your transparent masterpieces with crystal-clear resin sculptures!