
3 Inspiring Resin Art Ideas
Creativity knows no bounds and resin art offers a captivating canvas for expressing your imagination. Resin provides endless possibilities whether you’re a seasoned artist or just dipping your toes into the art world. From mesmerizing abstract designs to intricate landscapes, the only limit is your creativity. This blog will explore ten inspiring resin art ideas to ignite your imagination and elevate your artistic journey.
Ocean-Inspired Resin Waves:
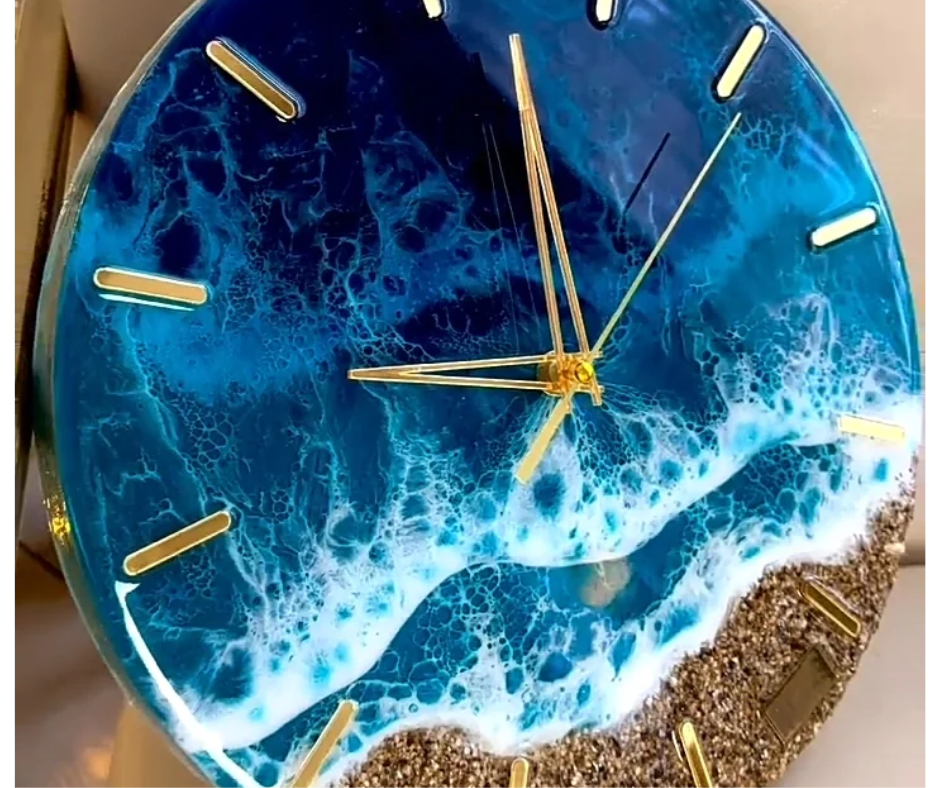
Ocean-Inspired Resin Waves
The ocean has long been a source of inspiration for artists worldwide. Its vastness, beauty, and ever-changing nature evoke a sense of wonder and tranquility. Ocean-inspired resin waves offer a unique way to bring the mesmerizing essence of the sea into your artwork. In this article, we’ll explore the techniques and steps to create stunning resin waves that capture the beauty and movement of the ocean.
Understanding Resin Art:
Resin art involves using a two-part epoxy resin mixture that, when combined, creates a durable and glossy finish. It’s a versatile medium that allows artists to experiment with colors, textures, and effects to create captivating artwork. Creating ocean-inspired resin waves aims to mimic the fluidity and depth of natural waves crashing against the shore.
Materials Needed:
- Epoxy resin and hardener
- Resin pigments in various shades of blue, white, and turquoise
- Mixing cups and stirring sticks
- Disposable gloves and protective gear
- Resin mold or canvas
- Heat gun or torch for removing air bubbles
- Optional: glitter or mica powder for added shimmer
Step-by-Step Guide:
- Prepare your workspace: Ensure your workspace is clean, well-ventilated, and free from dust or debris that could contaminate your resin artwork.
- Mix the resin: Follow the manufacturer’s instructions to mix the epoxy resin and hardener in the correct ratio. Stir the mixture thoroughly until it is clear and accessible from streaks.
- Add pigments: Divide the mixed resin into separate cups and add resin pigments to create shades of blue, white, and turquoise. Experiment with blending the colors to achieve the desired gradient effect.
- Pour the resin: Pour a layer of clear resin onto your chosen surface, whether it’s a resin mold or canvas. It will serve as the base layer for your ocean waves.
- Make the waves happen: Pour thin streams of each hue onto the foundation layer of resin using a mixture of turquoise, white, and blue resin. To create patterns and swirls resembling ocean waves, combine the colors using a palette knife or stirring stick.
- Add depth and texture: To enhance the depth and texture of your resin waves, use a heat gun or torch to heat the surface of the resin gently. It will help remove air bubbles and create natural-looking ripples and waves.
- Optional embellishments: For added visual interest, consider sprinkling glitter or mica powder onto the wet resin to mimic the sparkle of sunlight dancing on the water’s surface.
- Allow to cure: Once you’re satisfied with the appearance of your resin waves, allow the artwork to cure according to the manufacturer’s instructions. It typically involves letting the resin dry and harden for 24-48 hours.
- Finishing touches: Once the resin has fully cured, remove it from the mold or prepare it for display on canvas. You can further enhance your ocean-inspired resin waves by adding additional layers of resin for depth or framing the artwork for a polished finish.
Conclusion:
Ocean-inspired resin waves offer a captivating way to bring the beauty and tranquility of the sea into your home or studio. You can create stunning artwork capturing the ocean’s movement and depth with suitable materials and techniques. So, gather your supplies, unleash your creativity, and embark on a journey of artistic exploration with ocean-inspired resin waves.
II. Resin Jewelry Making:
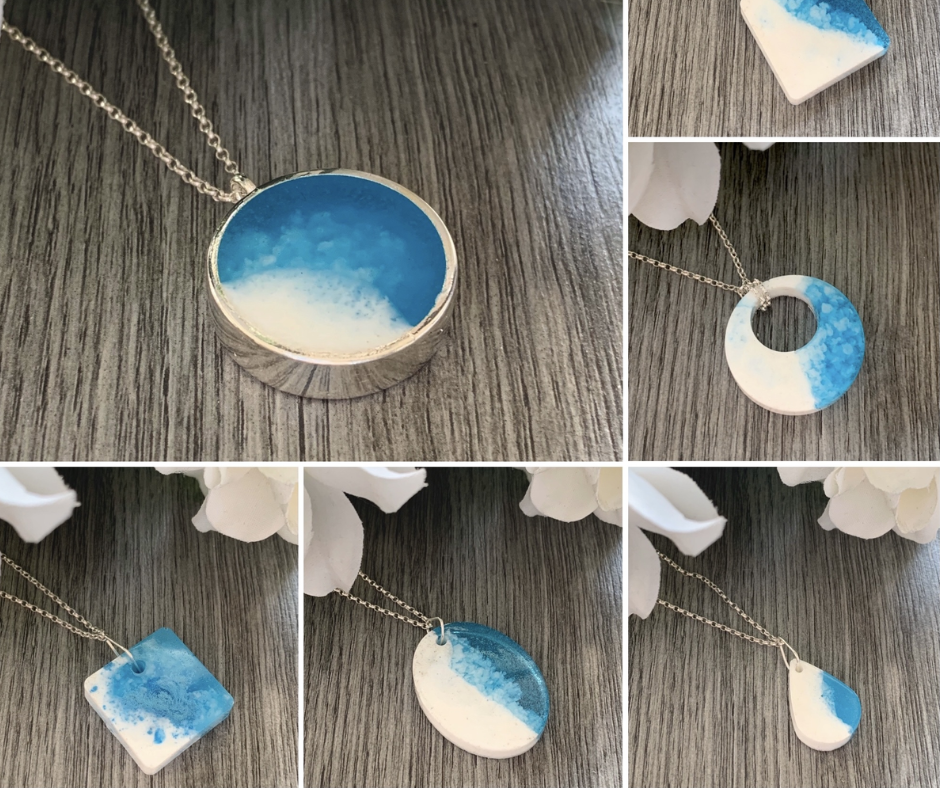
Resin Jewelry
A Guide to Resin Jewelry Making
Resin jewelry making has surged in popularity recently, offering artists and crafters a versatile medium to create unique and personalized accessories. Resin jewelry allows for endless creativity & customization, from vibrant pendants to intricate earrings. This article delves into resin jewelry making, exploring the materials, techniques, and steps of crafting stunning wearable art pieces.
Materials Needed:
- Epoxy resin and hardener
- Silicone molds in various shapes and sizes
- Resin pigments, dyes, or alcohol inks for coloring
- Glitter, mica powder, or other embellishments
- Jewelry findings (e.g., earring hooks, necklace chains, jump rings)
- Disposable gloves and protective gear
- Stirring sticks and mixing cups
- Heat gun or torch for removing air bubbles
- Optional: Resin doming kit for creating a glossy finish
Step-by-Step Guide:
- Prepare your workspace: Set up a clean, well-ventilated workspace with all necessary materials within reach. Lay down a protective covering to prevent spills & stains.
- Mix the resin: Follow the manufacturer’s instructions to mix the epoxy resin and hardener in the correct ratio. Stir the mixture thoroughly until it is clear and accessible from streaks.
- Add color and embellishments: Divide the mixed resin into separate cups and add resin pigments, dyes, or alcohol inks to create the desired colors for your jewelry pieces. You can also incorporate glitter, mica powder, or other embellishments to & sparkle and texture.
- Pour the resin into the molds: Gently fill the silicone molds with colored resin until the required level is reached. To make swirls and patterns in the resin or to reposition any implanted ornaments, use a stirring stick or toothpick.
- Remove air bubbles: To ensure a smooth and bubble-free finish, use a heat gun or torch to heat the resin’s surface gently. It will help to release any trapped air bubbles and create a flawless finish.
- Allow to cure: Once you’re satisfied with the appearance of your resin jewelry pieces, allow them to cure according to the manufacturer’s instructions. It typically involves letting the resin dry and harden for 24-48 hours.
- Demold and finish: Carefully remove the cured resin pieces from the molds. If desired, sand any rough edges or imperfections using fine-grit sandpaper. You can also use a resin doming kit to create a glossy, polished finish on the surface of your jewelry pieces.
- Attach jewelry findings: Once your resin pieces are fully cured & finished, attach jewelry findings such as earring hooks, necklace chains, or jump rings using strong adhesive or embedding them directly into the resin during the casting process.
- Wear and enjoy: It’s time to wear and admire your gorgeous resin jewelry pieces! These unique items will turn heads wherever you go, whether keeping them for yourself or giving them as gifts.
Conclusion:
Resin jewelry making offers a fun and rewarding way to express creativity and style. With a few basic materials & techniques, you can create beautiful and personalized accessories that are as unique as you are. So, gather your supplies, unleash your imagination, and start crafting your wearable works of art with resin jewelry making!
III. Crystal Clear Resin Sculptures:
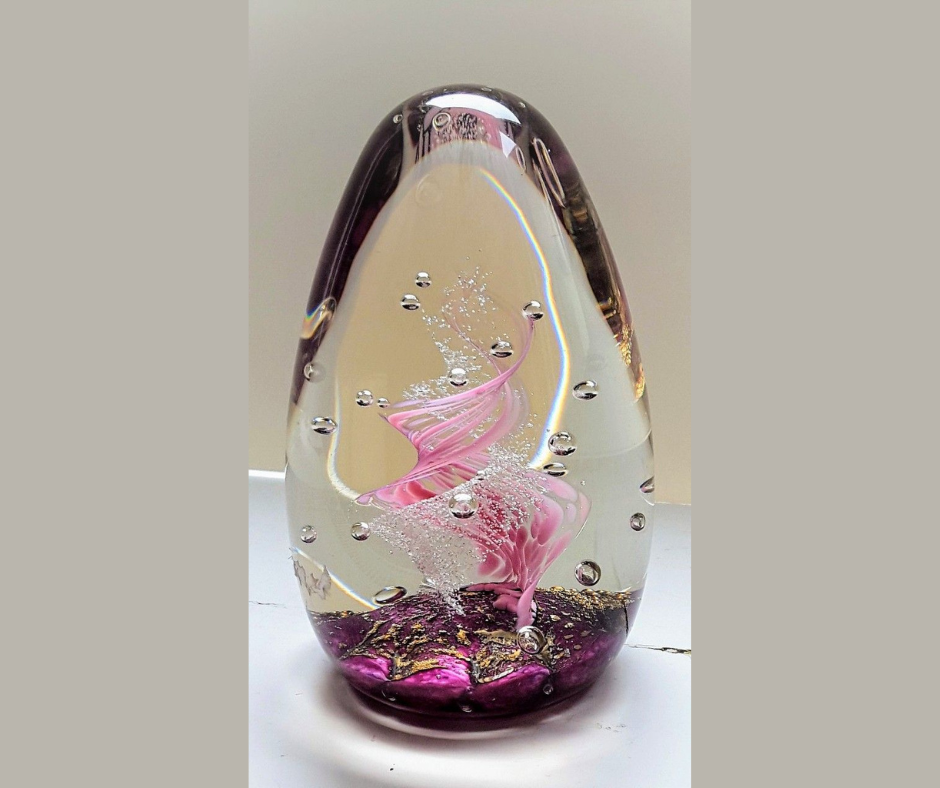
Crystal Clear Resin Sculptures
The Art of Crystal Clear Resin Sculptures
In art, transparency can be just as captivating as color. Crystal transparent resin sculptures offer artists a unique medium to explore the beauty of transparency and light. From delicate figurines to intricate abstract forms, these sculptures invite viewers to marvel at the play of light and shadow within their transparent depths. In this article, we’ll delve into the fascinating world of crystal transparent resin sculptures, exploring the materials, techniques, & creative possibilities they offer.
Materials Needed:
- Epoxy resin and hardener
- Silicone molds or casting forms
- Disposable gloves & protective gear
- Stirring sticks and mixing cups
- Optional: Resin-compatible pigments or dyes for tinting
- Optional: Embedded objects or inclusions for added interest
- Heat gun or torch for removing air bubbles
- Sandpaper or polishing compound for finishing touches
Step-by-Step Guide:
- Prepare your workspace: Set up a clean, well-ventilated workspace with all necessary materials within reach. Lay down a protective covering to prevent spills and stains.
- Mix the resin: Follow the manufacturer’s instructions to mix the epoxy resin and hardener in the correct ratio. Stir the mixture thoroughly until it is clear and accessible from streaks.
- Optional: Add color or inclusions: Add resin-compatible pigments or dyes to tint the resin to your desired hue. For added visual interest, you can also incorporate embedded objects or inclusions such as flowers, shells, or metallic flakes.
- Pour the resin: Fill silicone molds or casting forms to the correct level by carefully pouring the blended resin into them. Use a stirring stick or toothpick to make swirls and patterns in the resin or reposition any implanted objects.
- Remove air bubbles: To ensure a smooth and bubble-free finish, use a heat gun or torch to heat the resin’s surface gently. It will help to release any trapped air bubbles and create a flawless finish.
- Allow to cure: Once you’re satisfied with the appearance of your resin sculpture, allow it to cure according to the manufacturer’s instructions. It typically involves letting the resin dry and harden for 24-48 hours.
- Demold and finish: Carefully remove the cured resin sculpture from the mold or casting form. If desired, sand any rough edges or imperfections using fine-grit sandpaper. You can also use a polishing compound to buff the sculpture’s surface to a glossy finish.
- Display and admire: Your stunning crystal clear resin sculpture is ready to be displayed and admired! Whether a standalone piece or part of a larger installation, its transparent beauty will captivate viewers and spark conversation.
Creative Possibilities:
Crystal clear resin sculptures offer endless creative possibilities for artists and makers. Experiment with different molds, shapes, & sizes to create sculptures that range from small and delicate to large and imposing. Explore the interplay of light and shadow within the transparent resin to create captivating visual effects. Incorporate embedded objects, inclusions, or even LED lights to add layers of complexity and intrigue to your sculptures.
Crystal clear resin sculptures are a testament to the beauty and versatility of transparent materials in art. With a few basic materials and techniques, artists can create stunning sculptures that capture the imagination & inspire wonder. So, gather your supplies, unleash your creativity, and start crafting your transparent masterpieces with crystal-clear resin sculptures!