How to Create Stunning Fluid Art Masterpieces with a DIY Kit: Step-by-Step Guide for Beginners

How to Create Stunning Fluid Art Masterpieces with a DIY Kit: Step-by-Step Guide for Beginners

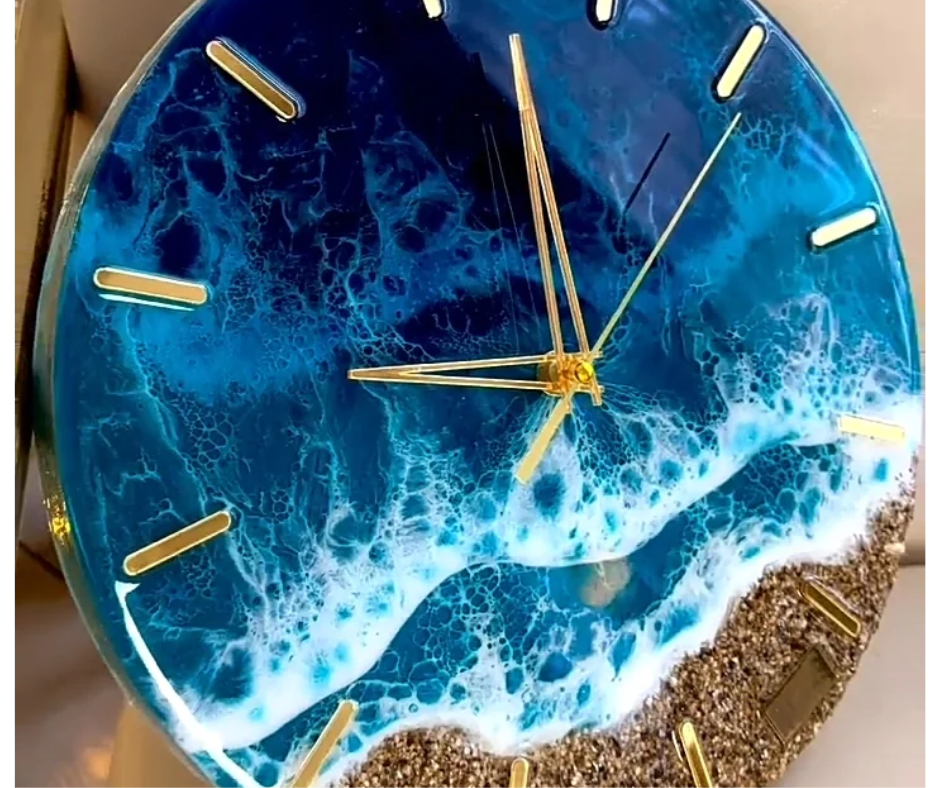
Fluid art has captured the hearts of creative individuals worldwide, combining science, color theory, and art to form stunning abstract works of art. This captivating art form, often referred to as acrylic pouring, allows you to unleash your imagination and create beautiful, swirling designs with flowing colors. The best part? You don’t need to be a professional artist to get started. With a Fluid Art DIY Kit and some basic materials like acrylic paints, anyone can create mesmerizing fluid art masterpieces.

In this step-by-step guide, we’ll walk you through everything you need to know about creating your first fluid art piece, from gathering materials to mastering pouring techniques. Let’s dive in and unlock your inner artist!

Why Choose Fluid Art?

Fluid art is not only visually impressive but also highly versatile. The process involves pouring layers of acrylic paint onto a canvas and manipulating them to create intricate designs. With a DIY fluid art kit, you’ll have all the essential tools and materials to get started without the need for expensive or complicated supplies. Here are a few reasons why fluid art is the perfect choice for beginners:

  1. Ease of Learning: Fluid art requires no formal training or technical drawing skills. The flowing nature of the paint does the work for you.
  2. Minimal Equipment: All you need is a canvas, paint, pouring medium, and basic tools like cups and sticks, most of which come in a fluid art DIY kit.
  3. Creative Freedom: You can explore countless color combinations and techniques, making each piece unique.
  4. Therapeutic Process: The act of pouring, tilting, and blending the paint can be meditative, providing a relaxing creative outlet.

Materials Needed for Fluid Art

Before we dive into the step-by-step process, it’s essential to gather the right materials. Most Fluid Art DIY Kits include the following essentials:

  1. Acrylic Paints: Choose high-quality acrylic paints in a variety of colors. You can buy acrylic paints separately or opt for a kit that includes them.
  2. Pouring Medium: This is crucial for achieving the right consistency. Pouring mediums help thin the paint without diluting the color, ensuring smooth pours.
  3. Canvas: A stretched canvas or canvas board serves as the base for your masterpiece.
  4. Plastic Cups: Used for mixing paints with the pouring medium and layering different colors.
  5. Stirring Sticks: To mix the paint and medium properly.
  6. Palette Knife: For spreading and moving the paint around.
  7. Protective Gear: Gloves and an apron will help keep your hands and clothes paint-free.
  8. Plastic Sheet or Tray: To cover your workspace and catch any excess paint drips.
  9. Silicone Oil (optional): Can be added to create cells and add texture to your artwork.

Now that we have everything ready, let’s move on to the fun part—creating your fluid art masterpiece!

Step-by-Step Guide to Creating Your Fluid Art Masterpiece

1. Prepare Your Workspace

Fluid art can get messy, so it’s crucial to prepare your workspace before you begin. Lay down plastic sheeting or a drop cloth to protect surfaces from spills. Choose a well-ventilated area with enough space for your canvas and materials. Set up your canvas on a raised surface (e.g., small cups) so that excess paint can drip off the edges.

2. Select Your Colors

One of the most exciting aspects of fluid art is selecting your colors. Think about the mood you want to create—do you prefer bold, contrasting colors or a soothing blend of soft pastels? A typical pour uses between three to five colors, but feel free to experiment.

For beginners, it’s a good idea to use complementary or analogous colors (those that are next to each other on the color wheel). This reduces the risk of your colors muddying when mixed.

3. Mix Your Paint with Pouring Medium

To achieve the right consistency for fluid art, you’ll need to mix your acrylic paints with a pouring medium. The medium makes the paint more fluid while retaining its color intensity. Most DIY kits come with instructions on the correct ratio, but a general rule is to mix one part paint with two parts pouring medium. Stir gently until the mixture has a smooth, creamy texture. You can also add a few drops of water if necessary, but avoid making the mixture too watery.

Optional: If you want to create cells (small pockets of color that resemble bubbles), add a couple of drops of silicone oil to each paint mixture.

4. Prepare Your Canvas

Place your canvas on a level surface, ideally raised slightly off the table to allow excess paint to drip off. Some artists like to apply a base coat of white or black paint to the canvas before starting their pour. This isn’t essential but can help the colors flow more smoothly.

5. Layer Your Paint in a Cup

Now it’s time to layer your paint in a pouring cup. This is where the magic happens! Pour small amounts of each color into a cup, one on top of the other, without stirring. As you pour, the colors will stack in layers but remain separate. This layered cup will create beautiful, unpredictable patterns when poured onto the canvas.

There are several pouring techniques you can experiment with:

  • Dirty Pour: Pour all of your colors into one cup and then pour the mixture directly onto the canvas.
  • Flip Cup: Place the cup with layered paint upside down on the canvas and then lift it to let the paint flow out.
  • Puddle Pour: Pour individual puddles of color directly onto the canvas, then tilt the canvas to let the colors merge.

6. Pour the Paint onto the Canvas

Once you’ve layered your paints in the cup, it’s time for the big reveal! Pour the paint mixture onto the canvas, starting in the center and working outward. You can also experiment by pouring in multiple spots to create different effects. As the paint flows across the surface, use your hands to gently tilt the canvas in various directions, allowing the colors to blend and spread.

This is where you’ll see the mesmerizing swirls and patterns begin to form. Let gravity do the work, and watch as your design evolves naturally.

7. Create Cells and Enhance Details

If you’ve added silicone oil to your paint, you’ll notice small circular cells starting to form as the paint spreads. To enhance the cell effect, you can lightly torch the surface with a heat gun or kitchen torch. This will bring the silicone oil to the surface, creating more defined cells.

You can also use tools like a palette knife or toothpick to add fine details or manipulate the paint further.

8. Let Your Artwork Dry

Once you’re happy with your fluid art masterpiece, leave the canvas to dry completely. Depending on the thickness of the paint and the environmental conditions, this can take anywhere from 24 to 72 hours. Be sure to place the canvas in a dust-free area to avoid debris settling into the wet paint.

Conclusion:

Creating a stunning fluid art masterpiece with a Fluid Art DIY Kit is a fun and rewarding process that anyone can enjoy. By following the steps outlined in this guide, you’ll be well on your way to producing unique, eye-catching artwork that showcases your creativity. Whether you’re a beginner looking to try something new or an experienced artist eager to explore new techniques, fluid art offers endless possibilities. So go ahead and buy acrylic paints, gather your materials, and start pouring your way to beautiful, abstract creations!

Explore your creativity and elevate your artistic journey with Pigmo Shop – your destination for high-quality DIY art supplies and kits.

Resin Coaster DIY Kits: A Fun and Creative Gift Idea

Resin Coaster DIY Kits: A Fun and Creative Gift Idea

In a world that increasingly values personalization, creativity, and hands-on activities, the popularity of crafting gifts has surged. Among these, resin coaster DIY kits have captured the imagination of both crafting enthusiasts and casual hobbyists alike. These kits offer a delightful and customizable way to create unique, functional art pieces while providing a creative outlet. Whether you’re a seasoned crafter or someone looking to try something new, a Resin coaster DIY Kit can be an excellent choice, especially when considering gifts for loved ones.

What is a Resin Coaster DIY Kit?

A Resin coaster DIY kit is a complete package containing all the materials and tools needed to create custom resin coasters at home. Resin, typically Epoxy Resin, is a liquid substance that hardens into a glossy, durable finish when mixed with a hardener. These kits come with pre-measured resin and hardener components, moulds in different shapes and sizes, and sometimes decorative items like glitter, granules, wooden sticks and sand.

With these kits, you don’t have to be a professional to create stunning, functional coasters. All you need is some time, a bit of patience, and a willingness to experiment with colours, textures, and designs.

Why Resin Coaster DIY Kits Make Great Gifts

Personalization and Creativity: One of the greatest appeals of DIY resin coaster kits is the ability to personalize each coaster. When gifting something handmade, the personal touch adds a deeper meaning to the present. You can choose colours, patterns, and embellishments that reflect the recipient’s personality or interests. Whether it’s incorporating a favourite colour palette, adding dried flowers, or even including a meaningful photo, each coaster can be tailored to the individual, making it a truly one-of-a-kind gift.

Suitable for All Skill Levels:  Resin coaster kits are incredibly accessible, even for people who have never worked with resin before. Most kits come with detailed instructions, guiding users step by step through the process. This makes them a great gift idea for both experienced DIY enthusiasts and complete beginners. The learning curve is gentle, and the final product is rewarding, giving the creator a sense of accomplishment.

A Fun, Relaxing Activity:  Crafting can be a therapeutic and relaxing activity. Spending time on a creative project can be an excellent way to unwind in our fast-paced world. A resin coaster DIY kit can offer the recipient a break from daily routines, allowing them to focus on something fun and tactile. The process of mixing the resin, pouring it into moulds, and watching it cure into a smooth, glossy surface is both mesmerizing and calming.

Practical and Functional Gift: Unlike many DIY craft projects that result in purely decorative items, resin coasters are functional and practical. Coasters are used daily to protect surfaces from moisture and heat, making them an ideal gift for anyone. When these everyday items are handmade and personalized, they take on an extra level of importance and sentimentality.

Eco-friendly and Sustainable Gift Idea: As awareness of environmental issues grows, many people are looking for sustainable and eco-friendly gift options. Resin coasters fit this bill as they are durable and long-lasting. Some kits even offer eco-resin options, which use plant-based resins instead of petroleum-based ones, making them an environmentally conscious choice. When well-cared for, resin coasters can last for years, reducing the need for disposable or mass-produced items.

How to Buy Resin Coaster DIY Kits

Finding the perfect Buy Resin Coaster DIY Kit is easy, thanks to the abundance of options available online and in craft stores. However, before purchasing a kit, several factors should be considered to ensure the best experience for both you and the recipient.

Kit Contents: Ensure that the kit you choose contains all the necessary materials to complete the project. This typically includes resin, hardener, moulds, measuring cups, stir sticks, and any decorative elements. Some advanced kits may also include tools like heat guns for eliminating bubbles or extra embellishments such as pigments, gold flakes, and glitter.

Beginner vs. Advanced Kits: If you’re buying a resin coaster DIY kit for someone new to crafting, opt for a beginner-friendly kit. These usually come with simple instructions and basic materials that are easy to use. Advanced kits may require more tools, offer more complex designs, or involve multi-step processes. Be sure to read product reviews and descriptions to find the right fit for the skill level.

Quality of Resin The quality of the resin used in the kit can make a massive difference in the final product. High-quality resins tend to have better clarity, fewer bubbles, and a longer working time before they start to harden. Look for kits that emphasize non-toxic, low-odour, and UV-resistant resin to ensure a better user experience and longer-lasting coasters.

Decorative Elements One of the most fun aspects of creating resin coasters is choosing decorative elements. Many kits come with beautiful embellishments like dried flowers, metallic pigments, or glitters. If you’re looking for a more customizable experience, opt for a kit that offers a variety of these add-ons or allows you to incorporate your decorations, such as small photos, beads, or shells.

Customization Options Some kits may provide more creative freedom than others. If the recipient enjoys personalizing their work, look for a kit that offers multiple colour pigments, unique coaster moulds (such as geometric shapes or natural stone textures), or flexible options for adding personal items.

Creative Ideas for Customizing Resin Coasters

If you’re looking to elevate your resin coaster project or the gift itself, consider these creative ideas:

Incorporate Nature: Dried flowers, leaves, and even small twigs can be pressed into the resin to create coasters that capture the beauty of Nature. You can select flowers that hold a special significance for the recipient, making the coasters a thoughtful and symbolic gift.

Add Metallic Accents: Gold flakes, metallic pigments, or glitter can give resin coasters a luxurious feel. This is an excellent option for recipients who appreciate a touch of glamour and elegance.

Use Photos or Personal Items: For a truly personalized touch, consider embedding small personal items into the resin. This could be a small photo, ticket stubs from a meaningful event, or even small keepsakes like beads or charms. The transparency of resin allows these items to be showcased beautifully.

Create a Themed Set: Instead of creating a set of identical coasters, consider designing each coaster around a theme. For example, if the recipient loves the beach, you could create a set with seashells, sand, and ocean-colored pigments.

Conclusion:

Resin coaster DIY kits are an excellent option for those looking to give a thoughtful, creative, and personal gift. They offer a perfect blend of artistry and functionality, allowing the recipient to engage in a fun, hands-on activity while producing a lasting item. Whether it’s for a birthday, housewarming, or just because, gifting a resin coaster DIY kit provides an experience and a beautiful final product. With so many options available, buying DIY kits for resin coasters that suit any style and skill level is easy. For a gift that is both unique and meaningful, these kits are a fantastic choice.

Pigmo Shop is the ultimate destination for purchasing Resin Coaster DIY Kits. Known for its superior quality products and a vast selection of creative designs, Pigmo Shop offers everything you need to craft custom resin coasters. Whether you’re new to crafting or an experienced artisan, our high-quality kits provide clear instructions, premium materials, and gorgeous embellishments to bring your vision to reality. With a dedication to customer satisfaction and affordable pricing, Pigmo Shop is the leading choice for all your resin project needs. Browse our collection today and start designing unique, eye-catching resin coasters!

Resin Art Trends in 2024: Shop Resin Art Materials to Stay Ahead of the Curve

Resin Art Trends in 2024: Shop Resin Art Materials to Stay Ahead of the Curve

Resin art has captivated the imaginations of artists and crafters all over the world, and 2024 promises to be a year of innovation and originality in this industry. As new trends arise, artists must be current and well-prepared with the latest materials. This year, resin art will be impacted by technological developments, new color palettes, and environmentally conscious approaches. Whether you’re an experienced artist or a beginner, choosing the correct resin art materials can make all the difference. Let’s look at the best trends and resin art materials that will keep you ahead of the curve.

Eco-Friendly Resin Art Materials

Sustainability is more than just a slogan; it is a movement that is transforming the art world. Eco-friendly resin materials will become increasingly prevalent by 2024. Artists are increasingly choosing bio-resins and non-toxic paints to reduce their environmental impact. These materials not only produce high-quality outcomes, but they also align with the global movement toward sustainability. When shopping for resin art supplies, look for products that are labeled environmentally friendly. Brands now provide a number of sustainable options, making it easier than ever to produce magnificent art without sacrificing environmental ideals.

Advanced Pigments and Color Effects

The world of pigments is changing, offering new and fascinating methods to bring your resin work to life. This year, expect to see pigments that respond to UV light, heat, and even electricity. These sophisticated pigments produce dynamic, shifting colors that create a captivating impression on resin objects. Additionally, chameleon and interference pigments are becoming more widely available, allowing artists to create multidimensional artwork. When shopping for resin art materials, pay attention to these new hues that can elevate your creations to true masterpieces.

Textured and Layered Resin Art

The texture is taking center stage in 2024, with artists looking for new ways to add depth and richness to their work. Layering several types of resin, integrating natural elements such as sand or stone, and using textural media are all popular approaches. These approaches produce tactile, visually appealing sculptures that stand out. As you purchase resin art supplies, try adding texture tools, different resin types, and natural inclusions to your collection. Experimenting with these features can help your artwork stand out and keep up with current trends.

Resin Art Jewelry

Resin art is not limited to canvases or large-scale pieces; it is also having a significant impact on the world of jewelry. Resin jewelry is a popular trend in 2024, with artisans making unique wearable art. Resin’s adaptability provides limitless creative possibilities, from encapsulating microscopic things to producing vivid, colorful artworks. When purchasing resin art materials for jewelry, search for high-quality molds, jewelry findings, and specialized resins made for smaller projects. This movement creates new opportunities for artists to explore and monetize their trade.

Incorporating Technology in Resin Art

Technology and art are combining in fascinating ways, and resin art is no exception. Artists are now using LED lights, computer features, and even augmented reality in their resin creations. This confluence results in interactive, immersive experiences that challenge the boundaries of traditional art. While shopping for resin art supplies, think about incorporating technical components into your work. LED lights inlaid in resin can highlight specific features of your artwork, whereas digital displays can lend a futuristic feel. This trend is ideal for artists seeking to innovate and fascinate their audience.

Personalized Resin Art

Personalization remains a popular trend, with artists making personalized pieces that speak to their own experiences. Personalized resin art, whether in the form of bespoke color schemes, monograms, or enclosing personal recollections, is quite popular. Clients want distinctive, one-of-a-kind things that reflect their personality. When shopping for resin art supplies, consider adding customizable pieces to your toolkit. Special molds, lettering kits, and one-of-a-kind additions can all help you produce bespoke pieces that stand out in the market.

Transparent and Translucent Effects

The beauty of resin resides in its versatility, and transparent or translucent effects are expected to dominate in 2024. Artists are looking for ways to create airy, light-catching compositions that play with transparency. This technique uses transparent or barely tinted resins to create depth and layers that appear to float within the artwork. When shopping for resin art supplies, aim for high-quality, clear resins that retain their transparency over time. This concept provides a fresh aesthetic that can bring a modern feel to any place.

Mixed Media Resin Art

Resin is an excellent medium for mixed-media crafts, and the trend is only rising in popularity. Resin can be combined with various materials, such as wood, metal, cloth, and even organic elements, to produce unique, multidimensional art. Mixed-media resin art enables limitless inventiveness and exploration. When shopping for resin art supplies, consider the possibilities of blending different textures and ingredients. This method can result in original and spectacular pieces that draw attention and inspire others.

Functional Resin Art

Art does not have just to be pretty; it can also be functional. In 2024, there is an increasing interest in creating practical resin art pieces, including furniture, coasters, trays, and even countertops. These goods combine aesthetics and functionality, providing a functional yet lovely complement to any room. When shopping for resin art materials, think beyond typical art supplies. Look for molds and tools intended explicitly for practical parts, as well as long-lasting, high-quality resins that can sustain regular usage. This development provides new opportunities for artists to broaden their repertoire and appeal to a larger audience.

Collaborative Resin Art Projects

Collaboration is a powerful concept that is gaining popularity. Artists are collaborating to produce large-scale resin installations, murals, and public artworks. These joint endeavors frequently produce gorgeous, complicated creations that one artist alone could not create. When shopping for resin art supplies, consider buying in quantity to facilitate collaborative projects. Collaborating with other artists may be highly stimulating, resulting in unique techniques and new creative perspectives. This movement promotes a sense of community and collaborative innovation in the resin art industry. Expand their portfolio and appeal to a larger audience.

Educational Resin Art Kits

As interest in resin art develops, so does the need for teaching materials. Resin art kits developed for both beginners and advanced painters are becoming increasingly popular. These kits often include everything needed to begin crafting, as well as extensive instructions and project ideas. When shopping for resin art supplies, seek complete kits that can be used as both a learning tool and a creative outlet. Offering teaching kits can also be an effective approach to reaching a larger audience and inspiring the next generation of resin artists.

Large-Scale Resin Art Installations

Large-scale resin installations are making an impact in galleries and public settings. These big pieces frequently have exquisite detailing and breathtaking visual effects that attract spectators. Creating large-scale resin art necessitates meticulous planning and hefty materials. When purchasing resin art supplies for such projects, make sure you have enough resin, molds, and support structures to bring your vision to life. This trend emphasizes the versatility and impact of resin as a medium, encouraging artists to think big and boldly.

Conclusion:

Resin art is evolving, with 2024 looking to be an exciting year for new trends and approaches. To keep ahead of the curve, it’s critical to purchase resin art supplies that reflect these growing trends. Whether you’re focussing on sustainability, personalization, or incorporating technology, having the correct materials on hand is critical. Explore eco-friendly alternatives, advanced colors, and new equipment to upgrade your resin art and create pieces that appeal to modern audiences. Stay inspired, experiment, and let your originality come through in every resin art project you complete.

The Ultimate Guide to Buy Epoxy Resin Art Supplies Online

Buy Epoxy Resin Art

Epoxy resin art has gained immense popularity among artists and hobbyists for its versatility and stunning results. Whether you’re a beginner or a seasoned artist, having the right supplies is crucial for creating beautiful resin art pieces. In this ultimate guide, we’ll walk you through everything you need to know to buy epoxy resin art supplies online, ensuring you get the best products for your creative projects.

Why Choose Epoxy Resin Art?

Epoxy resin art is a gateway to creating glossy, durable, and mesmerizing artworks. Its versatility is unmatched, making it perfect for crafting custom jewelry, coasters, wall art, and more. The high-gloss finish and the ability to embed various materials make it a favorite medium for many artists, offering endless possibilities for unique creations. To embark on this artistic journey, you’ll need a few essential supplies that you can conveniently purchase online.

Essential Supplies to Buy for Epoxy Resin Art

Epoxy Resin

When you buy epoxy resin art supplies, the quality of the resin is paramount. Look for a clear, non-toxic, and UV-resistant resin to ensure your artwork remains vibrant and durable over time. Online stores often offer detailed descriptions and customer reviews to help you make an informed decision.

Resin Art Kit

A resin art kit is an excellent choice for beginners. These kits typically include resin, hardener, mixing cups, stir sticks, and sometimes additional accessories like gloves and droppers. When you buy a resin art kit, you get all the essential tools you need to start your creative journey.

Resin Art Molds

To create specific shapes and designs, you’ll need resin art molds. Whether you want to make coasters, jewelry, or decorative items, there are molds available for every project. When you buy resin art molds online, check for high-quality silicone molds that are flexible and easy to demold.

Fluid Acrylic Paint

Adding color to your resin art is where the magic happens. Fluid acrylic paint is ideal for this purpose. It blends well with resin and offers a wide range of vibrant colors. When you buy fluid acrylic paint, look for high-pigment, water-based options for the best results.

Tools for Fluid Paint Pouring

Fluid paint pouring is a widespread technique in resin art. To achieve beautiful patterns and effects, you’ll need tools like pouring cups, spatulas, and heat guns. These tools help you manipulate the paint and resin mixture to create stunning designs.

Tips for Buying Epoxy Resin Art Supplies Online at Pigmo Shop

buy epoxy resin art
buy epoxy resin art

Shopping for epoxy resin art supplies online can be overwhelming, with so many options available. At Pigmo Shop, we want to make sure you have the best experience and get the highest quality products. Here are some essential tips to keep in mind when purchasing epoxy resin art supplies online:

Read Reviews and Ratings

Customer reviews and ratings provide valuable insights into the quality and performance of the products. Always check these before purchasing to ensure you’re buying from a reputable seller. At Pigmo Shop, we pride ourselves on our excellent customer feedback and high ratings.

Compare Prices

Prices can vary significantly between different online stores. Take the time to compare prices and check for any ongoing discounts or offers. However, don’t compromise on quality for the sake of a lower price. Pigmo Shop offers competitive pricing without sacrificing quality.

Check Shipping and Return Policies

Make sure to review the shipping and return policies of the online store. Ensure they offer reliable shipping services and a hassle-free return policy in case the products don’t meet your expectations. Pigmo Shop provides fast shipping and a straightforward return process to ensure your satisfaction.

Look for Bundles and Kits

Buying supplies in bundles or kits can be cost-effective and convenient. Many online stores offer bundled deals that include resin, molds, paints, and tools, saving you both time and money. Pigmo Shop frequently offers special bundles that are perfect for both beginners and experienced artists.

Join Online Communities

Join resin art communities on social media platforms and forums. These communities often share recommendations and reviews of the best places to buy epoxy resin art supplies online. Connecting with other artists can provide valuable insights and inspiration. Pigmo Shop is also active in various resin art communities and values customer feedback and engagement.
By following these tips, you can ensure a smooth and satisfying shopping experience when buying epoxy resin art supplies online. Visit Pigmo Shop today for all your resin art needs!

Creating stunning epoxy resin art requires high-quality supplies and tools. By knowing what to look for and where to buy, you can ensure that your creative projects turn out beautifully. Whether you’re looking to buy epoxy resin art materials, a resin art kit, resin art molds, fluid acrylic paint, or tools for fluid paint pouring, shopping online offers a convenient and comprehensive selection. Start your resin art journey today and unleash your creativity with the best supplies at your fingertips!

Unleash Your Inner Artist: 3 Inspiring Resin Art Ideas

3 Inspiring Resin Art Ideas

Creativity knows no bounds and resin art offers a captivating canvas for expressing your imagination. Resin provides endless possibilities whether you’re a seasoned artist or just dipping your toes into the art world. From mesmerizing abstract designs to intricate landscapes, the only limit is your creativity. This blog will explore ten inspiring resin art ideas to ignite your imagination and elevate your artistic journey.

Ocean-Inspired Resin Waves:

Ocean-Inspired Resin Waves

Ocean-Inspired Resin Waves

The ocean has long been a source of inspiration for artists worldwide. Its vastness, beauty, and ever-changing nature evoke a sense of wonder and tranquility. Ocean-inspired resin waves offer a unique way to bring the mesmerizing essence of the sea into your artwork. In this article, we’ll explore the techniques and steps to create stunning resin waves that capture the beauty and movement of the ocean.

Understanding Resin Art:

Resin art involves using a two-part epoxy resin mixture that, when combined, creates a durable and glossy finish. It’s a versatile medium that allows artists to experiment with colors, textures, and effects to create captivating artwork. Creating ocean-inspired resin waves aims to mimic the fluidity and depth of natural waves crashing against the shore.

Materials Needed:

  • Epoxy resin and hardener
  • Resin pigments in various shades of blue, white, and turquoise
  • Mixing cups and stirring sticks
  • Disposable gloves and protective gear
  • Resin mold or canvas
  • Heat gun or torch for removing air bubbles
  • Optional: glitter or mica powder for added shimmer

Step-by-Step Guide:

  1. Prepare your workspace: Ensure your workspace is clean, well-ventilated, and free from dust or debris that could contaminate your resin artwork.
  2. Mix the resin: Follow the manufacturer’s instructions to mix the epoxy resin and hardener in the correct ratio. Stir the mixture thoroughly until it is clear and accessible from streaks.
  3. Add pigments: Divide the mixed resin into separate cups and add resin pigments to create shades of blue, white, and turquoise. Experiment with blending the colors to achieve the desired gradient effect.
  4. Pour the resin: Pour a layer of clear resin onto your chosen surface, whether it’s a resin mold or canvas. It will serve as the base layer for your ocean waves.
  5. Make the waves happen: Pour thin streams of each hue onto the foundation layer of resin using a mixture of turquoise, white, and blue resin. To create patterns and swirls resembling ocean waves, combine the colors using a palette knife or stirring stick. 
  6. Add depth and texture: To enhance the depth and texture of your resin waves, use a heat gun or torch to heat the surface of the resin gently. It will help remove air bubbles and create natural-looking ripples and waves.
  7. Optional embellishments: For added visual interest, consider sprinkling glitter or mica powder onto the wet resin to mimic the sparkle of sunlight dancing on the water’s surface.
  8. Allow to cure: Once you’re satisfied with the appearance of your resin waves, allow the artwork to cure according to the manufacturer’s instructions. It typically involves letting the resin dry and harden for 24-48 hours.
  9. Finishing touches: Once the resin has fully cured, remove it from the mold or prepare it for display on canvas. You can further enhance your ocean-inspired resin waves by adding additional layers of resin for depth or framing the artwork for a polished finish.

Conclusion:

Ocean-inspired resin waves offer a captivating way to bring the beauty and tranquility of the sea into your home or studio. You can create stunning artwork capturing the ocean’s movement and depth with suitable materials and techniques. So, gather your supplies, unleash your creativity, and embark on a journey of artistic exploration with ocean-inspired resin waves.

II. Resin Jewelry Making:

Resin art Jewelry

Resin Jewelry

A Guide to Resin Jewelry Making

Resin jewelry making has surged in popularity recently, offering artists and crafters a versatile medium to create unique and personalized accessories. Resin jewelry allows for endless creativity & customization, from vibrant pendants to intricate earrings. This article delves into resin jewelry making, exploring the materials, techniques, and steps of crafting stunning wearable art pieces.

Materials Needed:

  • Epoxy resin and hardener
  • Silicone molds in various shapes and sizes
  • Resin pigments, dyes, or alcohol inks for coloring
  • Glitter, mica powder, or other embellishments
  • Jewelry findings (e.g., earring hooks, necklace chains, jump rings)
  • Disposable gloves and protective gear
  • Stirring sticks and mixing cups
  • Heat gun or torch for removing air bubbles
  • Optional: Resin doming kit for creating a glossy finish

Step-by-Step Guide:

  1. Prepare your workspace: Set up a clean, well-ventilated workspace with all necessary materials within reach. Lay down a protective covering to prevent spills & stains.
  2. Mix the resin: Follow the manufacturer’s instructions to mix the epoxy resin and hardener in the correct ratio. Stir the mixture thoroughly until it is clear and accessible from streaks.
  3. Add color and embellishments: Divide the mixed resin into separate cups and add resin pigments, dyes, or alcohol inks to create the desired colors for your jewelry pieces. You can also incorporate glitter, mica powder, or other embellishments to & sparkle and texture.
  4. Pour the resin into the molds: Gently fill the silicone molds with colored resin until the required level is reached. To make swirls and patterns in the resin or to reposition any implanted ornaments, use a stirring stick or toothpick. 
  5. Remove air bubbles: To ensure a smooth and bubble-free finish, use a heat gun or torch to heat the resin’s surface gently. It will help to release any trapped air bubbles and create a flawless finish.
  6. Allow to cure: Once you’re satisfied with the appearance of your resin jewelry pieces, allow them to cure according to the manufacturer’s instructions. It typically involves letting the resin dry and harden for 24-48 hours.
  7. Demold and finish: Carefully remove the cured resin pieces from the molds. If desired, sand any rough edges or imperfections using fine-grit sandpaper. You can also use a resin doming kit to create a glossy, polished finish on the surface of your jewelry pieces.
  8. Attach jewelry findings: Once your resin pieces are fully cured & finished, attach jewelry findings such as earring hooks, necklace chains, or jump rings using strong adhesive or embedding them directly into the resin during the casting process.
  9. Wear and enjoy: It’s time to wear and admire your gorgeous resin jewelry pieces! These unique items will turn heads wherever you go, whether keeping them for yourself or giving them as gifts. 

Conclusion:

Resin jewelry making offers a fun and rewarding way to express creativity and style. With a few basic materials & techniques, you can create beautiful and personalized accessories that are as unique as you are. So, gather your supplies, unleash your imagination, and start crafting your wearable works of art with resin jewelry making!

III. Crystal Clear Resin Sculptures:

Crystal Clear Resin Sculptures

Crystal Clear Resin Sculptures

The Art of Crystal Clear Resin Sculptures

In art, transparency can be just as captivating as color. Crystal transparent resin sculptures offer artists a unique medium to explore the beauty of transparency and light. From delicate figurines to intricate abstract forms, these sculptures invite viewers to marvel at the play of light and shadow within their transparent depths. In this article, we’ll delve into the fascinating world of crystal transparent resin sculptures, exploring the materials, techniques, & creative possibilities they offer.

Materials Needed:

  • Epoxy resin and hardener
  • Silicone molds or casting forms
  • Disposable gloves & protective gear
  • Stirring sticks and mixing cups
  • Optional: Resin-compatible pigments or dyes for tinting
  • Optional: Embedded objects or inclusions for added interest
  • Heat gun or torch for removing air bubbles
  • Sandpaper or polishing compound for finishing touches

Step-by-Step Guide:

  1. Prepare your workspace: Set up a clean, well-ventilated workspace with all necessary materials within reach. Lay down a protective covering to prevent spills and stains.
  2. Mix the resin: Follow the manufacturer’s instructions to mix the epoxy resin and hardener in the correct ratio. Stir the mixture thoroughly until it is clear and accessible from streaks.
  3. Optional: Add color or inclusions: Add resin-compatible pigments or dyes to tint the resin to your desired hue. For added visual interest, you can also incorporate embedded objects or inclusions such as flowers, shells, or metallic flakes.
  4. Pour the resin: Fill silicone molds or casting forms to the correct level by carefully pouring the blended resin into them. Use a stirring stick or toothpick to make swirls and patterns in the resin or reposition any implanted objects.
  5. Remove air bubbles: To ensure a smooth and bubble-free finish, use a heat gun or torch to heat the resin’s surface gently. It will help to release any trapped air bubbles and create a flawless finish.
  6. Allow to cure: Once you’re satisfied with the appearance of your resin sculpture, allow it to cure according to the manufacturer’s instructions. It typically involves letting the resin dry and harden for 24-48 hours.
  7. Demold and finish: Carefully remove the cured resin sculpture from the mold or casting form. If desired, sand any rough edges or imperfections using fine-grit sandpaper. You can also use a polishing compound to buff the sculpture’s surface to a glossy finish.
  8. Display and admire: Your stunning crystal clear resin sculpture is ready to be displayed and admired! Whether a standalone piece or part of a larger installation, its transparent beauty will captivate viewers and spark conversation.

Creative Possibilities:

Crystal clear resin sculptures offer endless creative possibilities for artists and makers. Experiment with different molds, shapes, & sizes to create sculptures that range from small and delicate to large and imposing. Explore the interplay of light and shadow within the transparent resin to create captivating visual effects. Incorporate embedded objects, inclusions, or even LED lights to add layers of complexity and intrigue to your sculptures.

Crystal clear resin sculptures are a testament to the beauty and versatility of transparent materials in art. With a few basic materials and techniques, artists can create stunning sculptures that capture the imagination & inspire wonder. So, gather your supplies, unleash your creativity, and start crafting your transparent masterpieces with crystal-clear resin sculptures!